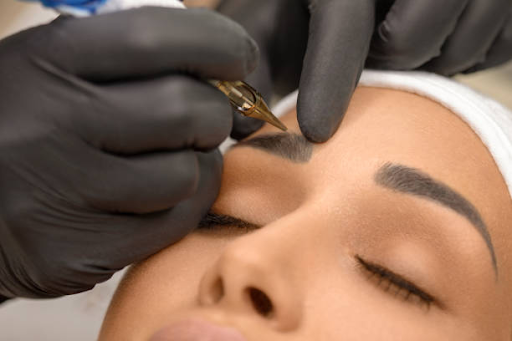
Getting your brows microbladed is an exciting journey toward fuller, more defined eyebrows, but understanding the healing process is crucial to achieving lasting results. The healing period can be complex, with various stages that can leave you wondering if things are progressing as they should. This guide offers a day-by-day breakdown to help you understand what’s normal and what each stage means for your microblading results. By knowing what to expect, you’ll be better prepared for a smooth recovery and beautiful, long-lasting brows.

Introduction to Microblading Healing Stages
Microblading involves creating fine hair-like strokes on the brow using pigment, but the true results only become visible after the healing process. During this time, you’ll notice several changes as your skin recovers and the pigment settles. Understanding each stage helps in recognizing normal reactions versus potential concerns. From initial swelling and redness to eventual color stabilization, each day offers unique indicators that reveal how well your brows are healing.
Initial Healing Period
The first few days after microblading are marked by sensitivity, with the pigment looking bolder and darker than expected. This is completely normal, as the skin is adjusting and pigment is settling. During this period, it’s vital to follow your technician’s aftercare advice strictly, as the success of your results depends heavily on early care.
Day 1–3: Redness and Swelling
Directly after the procedure, you may experience mild redness and swelling around the brow area, which can last for a few days. During this time, the pigment often appears darker due to the healing process. It’s important not to panic if your brows look more intense than anticipated, as this will change in the coming days. To manage swelling, consider applying a cold compress around the brows, but avoid direct contact to prevent disturbing the pigment.
- Avoid touching or scratching the brows.
- Keep the area dry and clean.
- Gently blot brows with a sterile tissue if necessary.
Early Scabbing and Flaking
As the initial swelling subsides, your skin will begin to form protective scabs. This stage can be challenging, as it may be tempting to pick at the scabs, but this must be avoided to prevent pigment loss and uneven results. Instead, focus on keeping the area moisturized with recommended products and continue to avoid getting it wet.
Day 4–7: Flaking and Itchiness
During this stage, flaking and itching become common as the brows scab over and start to flake off naturally. Moisturizing can help ease discomfort, but avoid heavy creams that could interfere with the healing process. Most people find that using a gentle, unscented moisturizer recommended by their technician provides sufficient relief without disturbing the pigment.
Color Stabilization Phase
As scabs naturally shed, you’ll notice the pigment appear lighter or uneven. This can be surprising if you were expecting darker brows, but this is just a temporary phase. The color will reappear and stabilize as your skin completes its healing. Here’s a table of key stages and common experiences to help you track your progress:
| Days | Stage | Appearance |
|---|---|---|
| 1–3 | Redness and Swelling | Darker pigment, mild swelling |
| 4–7 | Scabbing and Flaking | Flaking, lightening of color |
| 8–14 | Color Stabilization | Pigment appears lighter, uneven spots |
| 15–28 | Final Color Emerges | Color becomes consistent, brows fully healed |
Day 8–14: Color Lightening
As the brows heal, the color will initially lighten, leading to a faded look. However, this is a natural part of the process as the pigment settles under the skin. During this phase, avoid assessing the final result, as color adjustments and further healing will continue over the next few weeks.
Final Healing and Touch-Up Preparation
As the healing completes, you’ll see your brows settle into their final shape and color. The pigment will look natural and blend well with your skin tone. At this stage, it’s time to assess whether you need a touch-up. Touch-ups are typically scheduled six to eight weeks post-procedure to address any minor inconsistencies and enhance the brows further.
- Do not expose brows to excessive sun.
- Apply sunscreen after initial healing to protect pigment.
- Use gentle skincare products to avoid irritation.
Conclusion
Healing after microblading is a day-by-day process that requires patience and care. Each stage, from initial swelling to color stabilization, contributes to the final outcome. By following recommended aftercare and understanding the healing stages, you can ensure optimal results and enjoy beautifully defined brows. Remember that healing varies for each individual, but a well-informed approach will help you navigate each phase confidently.
FAQ
- How long does the entire healing process take? Full healing typically takes about four weeks, though this can vary.
- When can I start wearing makeup around my brows? Wait until your brows are fully healed before applying makeup nearby.
- Is scabbing normal after microblading? Yes, scabbing is part of the healing process but avoid picking at scabs.
- When should I go for a touch-up? A follow-up touch-up is usually recommended 6–8 weeks post-procedure.